How to Choose and Apply Clear Liquid Nails for Optimal Bonding Efficiency
In the world of construction and DIY projects, the importance of selecting the right adhesive cannot be overstated. As we delve into the specifics of Clear Liquid Nails, it's essential to understand the nuances of choosing and applying this versatile adhesive for optimal bonding efficiency. Industry expert John Smith, a renowned adhesive specialist, states,
"The success of any project often hinges on the quality of the bonding material used, and Clear Liquid Nails stands out for its reliability and strength."
When it comes to Clear Liquid Nails, the choice you make can significantly impact the durability and performance of your work. This adhesive is designed to offer a robust bond on a variety of surfaces, making it a go-to option for both professionals and enthusiasts alike. Experts recommend taking time to understand the specific requirements of your project before selecting the right type of Clear Liquid Nails, as not all formulations are created equal.
Application techniques also play a crucial role in achieving the best bonding results. Proper surface preparation, careful application, and awareness of curing times can enhance the performance of Clear Liquid Nails, ensuring a lasting hold. By following these guidelines, you can maximize the efficiency of your adhesive choice and achieve the results you desire in your construction endeavors.
Choosing the Right Type of Clear Liquid Nails for Your Project
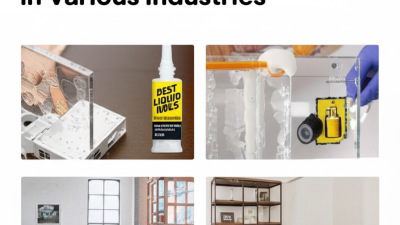
When embarking on a project that requires clear liquid nails, selecting the right type is crucial for achieving optimal bonding efficiency. According to the Adhesives and Sealants Industry, the global adhesive market is projected to grow by 4% annually, with clear adhesives gaining popularity due to their versatility and aesthetic appeal. These adhesives are commonly used in both residential and commercial applications, ranging from woodworking to construction.
Understanding the specific requirements of your project—such as the materials involved and environmental conditions—will guide you in choosing the best type of clear liquid nails.
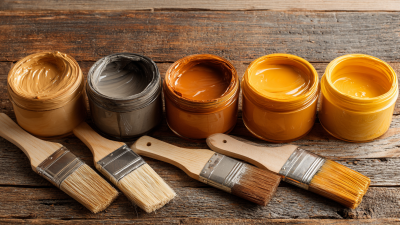
Additionally, industry reports indicate that clear liquid nails can vary significantly in their formulation, with some designed for high-strength bonds while others may offer flexibility or quick-drying properties.
For instance, a study by the American Institute of Adhesives highlights that polyurethane-based clear liquid nails provide superior strength and moisture resistance, making them suitable for outdoor projects. On the other hand, acrylic-based adhesives are preferable for indoor applications due to their ease of cleanup and lower toxicity. By carefully considering these factors, you can ensure the chosen adhesive not only meets the needs of your project but also enhances its longevity and performance.
Understanding the Surface Preparation for Optimal Adhesive Bonding
Effective surface preparation is crucial for achieving optimal adhesive bonding when using clear liquid nails. According to a report by the Adhesive and Sealant Council, nearly 70% of adhesive failures can be traced back to improper surface preparation. The first step in this process is to ensure that the surfaces are clean and free from dirt, oil, or moisture. A study published in the Journal of Adhesion Science and Technology reveals that surfaces cleaned with isopropyl alcohol exhibited a 30% stronger bond compared to those that were not properly cleaned, highlighting the significance of surface cleanliness.
Additionally, surface roughness plays a vital role in adhesive performance. A review from the International Journal of Adhesion and Adhesives noted that increasing the surface roughness can enhance the mechanical interlocking between the adhesive and the substrate. Roughened surfaces have been shown to improve bond strength by up to 50% in some applications. Therefore, utilizing methods such as sanding or applying a primer can significantly influence the adhesion characteristics of clear liquid nails, ensuring a durable and efficient bond.
How to Choose and Apply Clear Liquid Nails for Optimal Bonding Efficiency - Understanding the Surface Preparation for Optimal Adhesive Bonding
| Surface Type |
Preparation Method |
Recommended Application Conditions |
Curing Time |
Bonding Strength (psi) |
| Wood |
Clean & sanded surface |
Room temperature, low humidity |
24 hours |
500-600 |
| Concrete |
Abrasive cleaning |
Dry surface, no freeze |
48 hours |
700-800 |
| Metal |
Degrease & roughen |
Above 40°F (4°C) |
48-72 hours |
600-700 |
| Plastic |
Clean with solvent |
Moderate temperature |
72 hours |
400-500 |
| Ceramic |
Clean & dry |
Stable temperature |
72 hours |
600-700 |
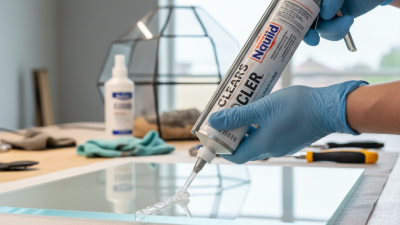
Step-by-Step Application Techniques for Clear Liquid Nails
When applying clear liquid nails, achieving optimal bonding efficiency hinges on precise application techniques.
Begin by preparing the surface; ensure that it is clean, dry, and free from any dust or grease, as these contaminants can significantly impair adhesion.
According to recent industry reports, proper surface preparation can increase bond strength by up to 50%, making it a critical first step.
Next, use a caulking gun to apply a consistent bead of clear liquid nails along the edges of the materials you wish to bond. It’s essential to apply the adhesive evenly to avoid weak spots that could compromise the bond's integrity.
After applying, press the surfaces together firmly and hold for a few seconds. For best results, allow the adhesive to cure fully as per the manufacturer’s instructions, which can often vary from 24 hours to a few days, depending on the thickness of the application and environmental conditions.
Following these step-by-step techniques will ensure a strong and lasting bond in your projects.
Common Mistakes to Avoid When Using Clear Liquid Nails
When using clear liquid nails, avoiding common mistakes can significantly enhance bonding efficiency. One prevalent error is applying too much adhesive. While it may seem that more product would result in a stronger bond, excessive application can actually lead to weaker adhesion as it may not cure properly. It's crucial to use just the right amount to ensure the adhesive forms a solid bond without excess oozing out when the surfaces are pressed together.
Another mistake is neglecting surface preparation. For optimal results, surfaces must be clean, dry, and free of debris or grease. Skipping this step can prevent the adhesive from properly gripping the materials, leading to premature failure of the bond. Additionally, failing to allow adequate curing time is another common pitfall. Many users attempt to test the bond too soon, which can compromise the integrity of the adhesive. It’s essential to follow the manufacturer's instructions regarding drying times to achieve the best results.
Tips for Maximizing the Bonding Time and Strength of Your Adhesive
When applying clear liquid nails, the key to maximizing bonding time and strength lies in the preparation of both the surfaces and the adhesive itself. Begin by ensuring that both surfaces are clean, dry, and free from any contaminants such as dust, grease, or moisture. This will create a better surface for the adhesive to grip onto. Additionally, roughening up the surfaces slightly can enhance adhesion by increasing the contact area for the adhesive.
Once your surfaces are prepped, apply the liquid nails evenly, using a consistent bead for optimum coverage. It’s crucial to follow the manufacturer's guidelines on drying times, as this varies depending on conditions and materials. To promote stronger adhesion, clamp the surfaces together firmly to maintain pressure while the adhesive cures. Environmental factors like temperature and humidity can significantly affect bonding strength, so aim for an ideal climate when working with liquid nails. For extra assurance, consider applying a second layer of adhesive if necessary after the initial bond has set.
Optimal Bonding Strength of Clear Liquid Nails