How to Choose the Best Nail Free Glue for Your Needs?
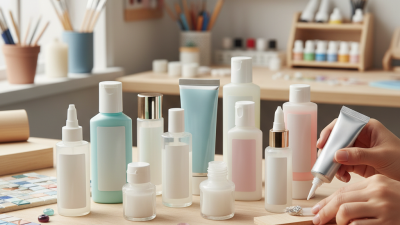
Choosing the right adhesive can be a daunting task. With so many options available, finding the perfect Nail Free Glue for your specific needs is crucial. This type of glue offers a unique solution for those who want a strong bond without the hassle of traditional nails or fasteners.
Consider the materials you will be working with. Nail Free Glue is particularly effective on various surfaces, such as wood, metal, and plastic. This versatility makes it an appealing choice for DIY enthusiasts and professionals alike. However, not all products are created equal. Factors like drying time and strength can vary significantly between brands.
Your project’s requirements should influence your selection. Some applications may demand quick adhesion, while others may prioritize durability. It’s essential to evaluate your priorities and perhaps even test a few options. Remember, experimentation can lead to discovery, but it might also result in unexpected challenges. By reflecting on these aspects, you can find a Nail Free Glue that truly meets your needs while ensuring a reliable and effective bond.
Understanding Nail Free Glue: What Is It?
Nail free glue is a versatile adhesive that offers a seamless bonding experience. It eliminates the need for traditional nails, making it easy to use. This type of glue is commonly used in various applications, from woodworking to craft projects. The unique formulation allows for strong adhesion without damaging the materials involved.
Understanding how nail free glue works is essential. It utilizes advanced chemistry to create solid bonds. Unlike conventional adhesives, it dries quickly and can handle significant stress. This feature is beneficial in both home repairs and artistic endeavors. Many users appreciate the clean finish that nail free glue provides, as it reduces the appearance of hardware.
However, not every project may be suitable for nail free glue. Certain materials might require a different adhesive approach. Users should assess the surfaces and conditions before application. Reflection on these factors can lead to better results and greater satisfaction with the finished work. Knowledge of the specific types and applications of nail free glue enhances your ability to choose the right one for your needs.
How to Choose the Best Nail Free Glue for Your Needs?
| Feature |
Description |
Ideal Use Cases |
| Type of Adhesive |
Water-based, solvent-free formulation. |
Crafts, paper, and light materials. |
| Drying Time |
Fast-drying, typically within 10-30 minutes. |
Quick repairs and projects. |
| Strength |
Medium to strong bond for lightweight materials. |
Hobbies and home decor. |
| Clean-Up |
Easily cleans with soap and water before curing. |
Negative space designs and intricate projects. |
| Safety |
Non-toxic and safe for indoor use. |
Use around children and pets. |
Types of Nail Free Glue and Their Uses
Nail-free glue offers a versatile alternative for various projects. Understanding the types and their specific uses is essential. There are several varieties of nail-free glue, each serving a unique purpose, and selecting the right one can significantly affect your results.
One common type is polyurethane-based glue. It's excellent for woodwork and furniture assembly. This glue expands as it dries, creating a strong bond. However, it requires some clamping time. For quick fixes, cyanoacrylate glue, often known as super glue, is ideal. It works on various surfaces and dries quickly. The downside? It can be brittle once cured, so it may not be suitable for areas experiencing stress.
Another variation is hot melt adhesive, typically applied using a glue gun. It's perfect for crafts and lightweight repairs. The bond isn't as strong as polyurethane, but it sets quickly. While experimenting with these adhesives, remember to evaluate their suitability for your specific needs. A poor choice can lead to weak bonds and damage. Aim to become familiar with each type to ensure successful applications.
Comparison of Nail Free Glue Types
This chart illustrates the adhesion strength of various types of nail free glue, measured in megapascals (MPa). Each type of glue offers different strengths and is suited for specific applications based on its properties.
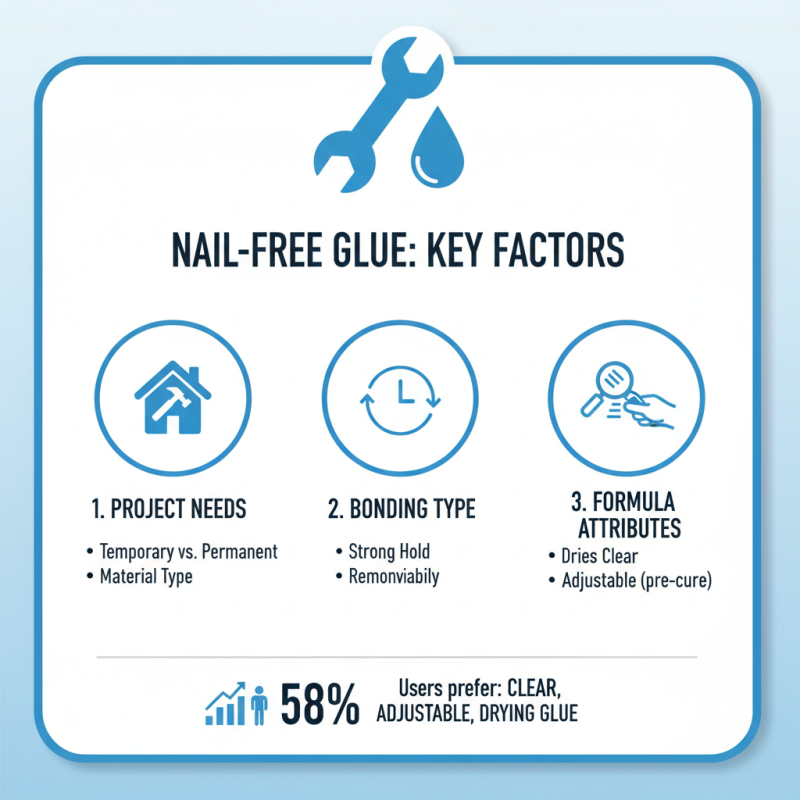
Key Factors to Consider When Choosing Nail Free Glue
When selecting nail-free glue, several key factors should guide your decision. First, assess your project needs. For temporary bonds, look for formulas that provide a strong hold yet are easy to remove. Data from market surveys indicate that around 58% of users prefer glues that dry clear and allow for adjustments before fully curing.
Consider the bond strength. Certain types of glue offer varying adhesion levels based on material. For instance, polyurethane-based glues generally outperform water-based ones in durability but may take longer to cure. More than 40% of users reported dissatisfaction when using inappropriate glue for their specific materials, leading to bond failure.
Tips: Always check the drying time. A glue that sets too quickly can lead to mistakes. Remember to perform a small test on a hidden area first. This approach reduces the risk of damage. Also, pay attention to the shelf life. Older products may not perform optimally.
Choosing the right nail-free glue might seem straightforward, but the nuances matter. The wrong choice can lead to frustrating failures. Consider these aspects carefully. Whether for home DIY projects or professional use, a thoughtful selection process enhances outcomes.
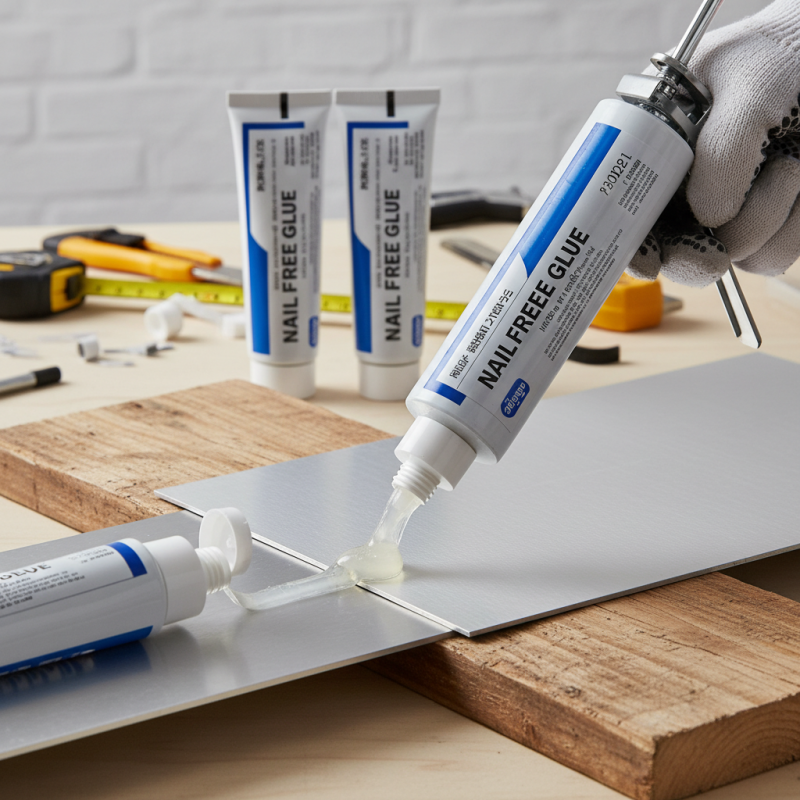
Application Techniques for Optimal Adhesion
When applying nail-free glue, preparation is crucial. Make sure the surface is clean and dry. Dust, grease, or moisture can weaken adhesion. Use a lint-free cloth to wipe the surfaces thoroughly. If necessary, sand the area lightly to create a better grip.
Applying the glue requires some finesse. Use a small amount to prevent excess from oozing out. A thin, even layer works best. Press the surfaces together firmly, and avoid shifting them for a few moments. This step is essential for optimal adhesion. Remember, patience pays off here.
Curing time varies depending on the glue type. Follow instructions closely. If you notice any gaps after curing, it may indicate improper application. Reflect on your technique to improve future applications. Sometimes, learning from mistakes leads to better outcomes. Testing different methods can also enhance your skills over time. Aim for perfection, but don't fear imperfections along the way.
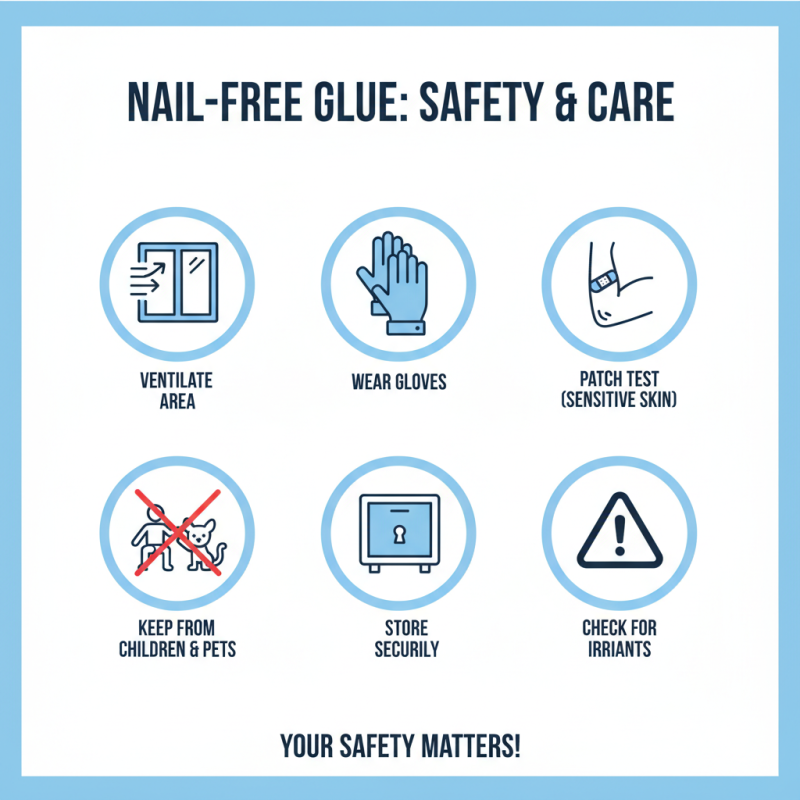
Safety Tips and Maintenance for Nail Free Glue
When using nail free glue, safety is paramount. Consider your workspace carefully. Ensure it's well-ventilated. This helps reduce inhalation of fumes. Wear gloves to protect your skin from irritation. Even small amounts can cause allergic reactions. If you have sensitive skin, a patch test is a good idea. Check the glue for any skin irritants. Always keep glue away from children and pets. Store it in a secure place.
Maintaining the glue is equally important. Always check the expiration date before use. Old glue may lose its effectiveness. Keep the cap tightly sealed to prevent drying. If the glue becomes clumpy or difficult to apply, it’s time to replace it. Clean any spills immediately with a damp cloth. Dried glue can be challenging to remove. A little care can extend the life of your nail free glue. Remember, even with proper use, accidents can happen. Be prepared for mishaps and act quickly.