Inquiry
Form loading...
In recent years, the home renovation and DIY project sectors have witnessed a significant surge, with the global DIY home improvement market projected to reach $680 billion by 2025 (Statista, 2021). Among the essential tools that have transformed how homeowners undertake these projects are adhesives, and one standout product is "Clear Liquid Nails." This versatile adhesive has gained popularity due to its exceptional bonding strength, transparency, and ease of use. According to industry reports, over 70% of DIY enthusiasts prefer using high-performance adhesives for their home upgrades, recognizing the impact of quality products on project outcomes. Whether you’re tackling a simple repair or a more extensive renovation, understanding how to effectively use Clear Liquid Nails can elevate your work quality and improve durability, making it an indispensable part of any DIY toolkit.

When embarking on home renovations or DIY projects, selecting the right type of clear liquid nails is crucial for ensuring durable results. Clear liquid nails come in various formulations tailored for specific materials and environmental conditions. According to the latest industry reports, the adhesive market has seen a steady growth of 3-5% annually, with clear adhesives gaining popularity due to their versatility and less visible bond lines. For instance, when working with wood, a polyurethane-based liquid nail is ideal as it provides excellent bonding strength and flexibility, accommodating natural wood movement.
Tip: Always check the drying time and curing conditions listed on the product label. Some clear liquid nails may require specific temperatures or humidity levels to achieve maximum strength.
For projects involving porous materials like concrete or brick, an epoxy-based adhesive is recommended for its superior bonding capabilities. Industry analyses suggest that products with enhanced water resistance are increasingly favored, especially for outdoor projects where humidity and moisture can compromise the bond.
Tip: Conduct a small adhesion test on the materials before full application to ensure compatibility and performance.
Preparing surfaces properly is crucial for achieving optimal adhesion when using Clear Liquid Nails for home renovations and DIY projects. The first step in surface preparation is to ensure that the area is clean and free of debris, dust, and any loose material. Using a damp cloth or sponge can help remove any residues that may interfere with bonding. For surfaces that are particularly oily or greasy, a mild detergent followed by thorough rinsing will help create a clean canvas for the adhesive.
After cleaning, it's important to assess the texture and condition of the surfaces you intend to bond. Smooth surfaces such as glass or polished metal may require light sanding to create a rougher profile, enhancing the adhesive's grip. On the other hand, porous materials like wood benefit from being sealed with an appropriate primer to prevent excessive absorption of the adhesive. Taking these steps ensures that Clear Liquid Nails will properly adhere, providing a strong, lasting bond that is essential for your renovation and DIY projects.
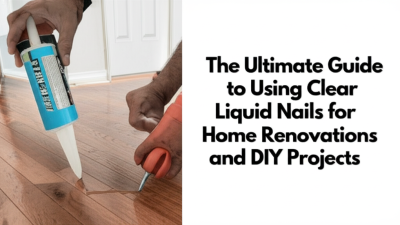
When it comes to applying clear liquid nails for your home renovation and DIY projects, mastering the step-by-step application techniques is essential for achieving a sturdy and lasting bond. Begin by preparing the surfaces you intend to work on; ensure they are clean, dry, and free from any grease or dust. This preparation is akin to the meticulous steps found in other routines, such as skincare, where the right foundation is crucial for optimal results.
Next, apply a precise amount of clear liquid nails to one of the surfaces. It’s important to use enough adhesive to cover the area without excessive overflow, similar to finding the right balance in a multi-step skincare regimen. Once applied, press the surfaces together firmly and keep them aligned to prevent any misalignment as the adhesive sets. For the best results, follow the manufacturer’s instructions regarding drying time and weight limits, ensuring your project not only looks great but also withstands the test of time. Just as with beauty routines, the technique you employ will directly influence the success of your results.
When using Clear Liquid Nails for home renovations and DIY projects, proper curing and storage are essential to achieve optimal results. To ensure that your adhesive works efficiently, always follow the manufacturer's guidelines on curing times, which typically range from 24 to 48 hours depending on the materials used and the environmental conditions. Allowing enough time for the adhesive to cure fully will guarantee strong bonds that can withstand daily wear and tear.
Tips for Curing: For best results, keep the glued surfaces properly aligned and secure during the curing period. Use clamps or tape to hold items together until the adhesive sets. Additionally, ensure that the area is well-ventilated if you are working indoors, as this helps the drying process and minimizes strong odors.
Storage of Clear Liquid Nails is just as crucial. Always store the adhesive in a cool, dry place, away from direct sunlight. Check the expiration date on the product, as using old adhesive can compromise the bond strength. For open tubes, ensure the cap is tightly sealed to prevent hardening. If the tip is clogged, cut it cleanly to maintain an easy flow for your future projects.
When embarking on DIY projects or home renovations, using clear liquid nails can be incredibly beneficial. However, many individuals make common mistakes that can undermine their efforts. One frequent error is not properly preparing the surfaces before application. Just as nail care experts advise against excessive buffing, which can weaken nails, it’s essential to ensure that surfaces are clean, dry, and free of dust or grease to achieve a strong bond. Skipping this step can lead to weak adhesion and premature failure of your project.
Another mistake is applying too much product. Similar to how people overuse retinol, thinking more will deliver better results, using excess liquid nails can lead to uneven surfaces and waste. Instead, applying a thin, even layer is preferable; this will ensure proper adhesion without making a mess. Additionally, many DIY enthusiasts forget the importance of curing time. Preemptively handling or stressing the bond before it fully cures can compromise the integrity of their work, just as ignoring dental care advice can lead to yellowing teeth. Being mindful of these pitfalls will not only enhance your projects but also elevate your overall DIY skills.


