How to Use Liquid Nails for a Stronger Bond in Your Home Projects
In the realm of home improvement, achieving a durable and reliable bond is essential for the longevity of your projects. According to a report by the Adhesive and Sealant Council, the U.S. adhesive market is projected to reach $16.3 billion by 2025, highlighting the growing reliance on high-quality bonding solutions in various applications.
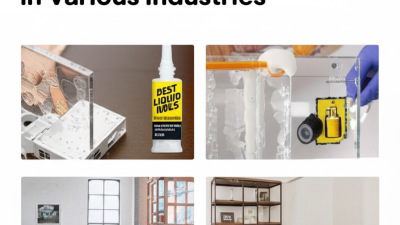
 Among these solutions, "Liquid Nails" has established itself as a leading adhesive brand, known for its strength and versatility. Whether you are tackling DIY tasks or larger renovations, understanding how to effectively use Liquid Nails can make a significant difference in the outcome of your work. This guide will provide you with tips and techniques to maximize the potential of Liquid Nails, ensuring that your projects not only look great but also stand the test of time.
Understanding Liquid Nails: Types and Their Best Uses
Liquid Nails is a versatile adhesive that offers various types to cater to different bonding needs in your home projects. Understanding these types is crucial for achieving the best results. For example, the Heavy Duty formula is ideal for construction tasks, providing a strong hold for materials like wood, metal, and concrete.
On the other hand, Interior construction adhesive works wonders for indoor projects, ensuring a firm bond without the strong odors associated with exterior adhesives.
When selecting the right Liquid Nails for your project, consider the surfaces you are working with and the environmental conditions. Outdoor adhesives are designed to withstand moisture and temperature fluctuations, making them suitable for external applications. Meanwhile, specialty formulas are tailored for specific materials, such as foam board or mirrors, ensuring a secure and durable attachment.
By leveraging the strengths of Liquid Nails, you can enhance the longevity and efficacy of your home improvements.
Preparing Surfaces for Optimal Adhesion with Liquid Nails
Preparing surfaces is crucial for achieving optimal adhesion when using Liquid Nails in your home projects. Start by ensuring that both surfaces you intend to bond are clean and free from dirt, dust, or grease. For porous materials like wood, a light sanding can help create a rougher texture, increasing the surface area for the adhesive to grip onto. If you're working with non-porous materials, such as plastic or metal, wiping them down with isopropyl alcohol will enhance adhesion by eliminating any residues that might interfere with the glue.
Once the surfaces are clean, consider the application method. Apply Liquid Nails in a continuous bead along one of the surfaces, making sure to apply enough adhesive to cover the area adequately without excessive overflow. Press the surfaces together firmly, allowing them to align properly. Depending on the project, you might need to use clamps or weights to hold them in place while the adhesive cures. Remember, the curing time can vary, so refer to the product instructions for best results. By taking the time to prepare your surfaces properly, you can ensure a strong and lasting bond that will enhance the durability of your home projects.
How to Use Liquid Nails for a Stronger Bond
This chart illustrates the importance of surface preparation for optimal adhesion using Liquid Nails. The data shows the effectiveness of different surface types in achieving a strong bond.
Step-by-Step Guide to Applying Liquid Nails Effectively
Liquid Nails is a versatile adhesive that can significantly enhance the durability of your home projects when applied correctly. According to the Adhesive and Sealant Council, the right adhesive can improve joint strength by up to 50%, ensuring that your repairs and installations stand the test of time. To utilize Liquid Nails effectively, it’s essential to follow a step-by-step approach. Start by preparing the surface: ensure it’s clean, dry, and free from dust or grease. Apply a sufficient amount of Liquid Nails on one surface, then press the materials together firmly and hold for a few moments to activate the bond.
Tip: For vertical applications, consider using Liquid Nails Heavy Duty Construction Adhesive, which provides superior holding power and reduces the risk of slipping during application. It's also essential to allow adequate curing time as per the manufacturer’s instructions—often up to 24 hours for maximum strength—before putting any stress on the bond.
For outdoor projects, choose an exterior-rated Liquid Nails product to ensure it can withstand weather conditions. Keep in mind that temperature and humidity can affect curing times and bond strength, so always check the conditions before starting your project. Following these steps will not only improve the effectiveness of your applications but also contribute to the longevity of your home improvements.
How to Use Liquid Nails for a Stronger Bond in Your Home Projects - Step-by-Step Guide to Applying Liquid Nails Effectively
| Step |
Description |
Tools Needed |
Drying Time |
| 1 |
Clean the surfaces to be bonded. |
Rag, Cleaner |
N/A |
| 2 |
Apply Liquid Nails evenly on one surface. |
Caulking Gun |
N/A |
| 3 |
Press both surfaces together firmly. |
Hands |
N/A |
| 4 |
Wipe away any excess adhesive. |
Rag |
N/A |
| 5 |
Allow to cure in place; avoid disturbance. |
N/A |
24 hours |
Common Mistakes to Avoid When Using Liquid Nails
When working with Liquid Nails, avoiding common mistakes can significantly enhance the strength of your bond in any home project. One frequent error is neglecting surface preparation. It’s crucial to ensure that both surfaces are clean, dry, and free from dust, grease, or old adhesive. Failing to do this can prevent the adhesive from properly adhering, resulting in a weaker bond.
Another pitfall is applying too much or too little adhesive. A thick layer might seem like it would secure the materials better, but excess glue can squeeze out, creating a mess and weakening the bond. Conversely, too little adhesive can lead to inadequate adhesion. A consistent, even bead is ideal for achieving optimal results.
Lastly, many users overlook the importance of clamping or securing the materials during the drying process. Many Liquid Nails products require a certain amount of time to cure fully, and movement during this period can compromise the integrity of the bond.
Tips for Storing and Maintaining Your Liquid Nails Products
Proper storage and maintenance of your Liquid Nails products can significantly enhance their performance and longevity. To ensure the adhesive remains usable, keep your tubes stored in a cool, dry place away from direct sunlight and extreme temperatures. Ideal storage conditions are between 50°F to 80°F (10°C to 27°C). Exposure to heat can lead to a decrease in viscosity and overall effectiveness, while freezing temperatures can cause the product to separate or become unusable.

Additionally, it’s crucial to check the expiration date before starting a project. Expired products may not adhere effectively and could lead to unsuccessful bonding in your home projects. After each use, clean the nozzle and re-cap the tube tightly to prevent any air from entering and hardening the adhesive inside. If you notice the nozzle clogging, using a small wire or pin can help clear it out. Proper handling and maintenance of your Liquid Nails products can ensure that you achieve the strong bonds you need for all your DIY endeavors.