How to Choose the Best Nail Free Adhesive for Your Projects?
Choosing the right Nail Free Adhesive can greatly impact the success of your projects. According to industry expert Dr. Sarah Thompson, “Selecting the right adhesive is as crucial as the materials you use.” Her extensive experience in adhesive formulations lends credibility to her insights.
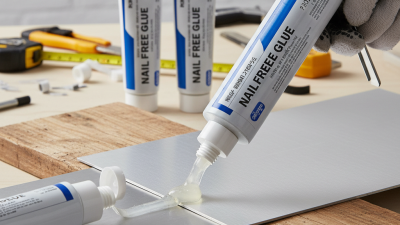
Nail Free Adhesives offer various advantages, such as ease of use and clean application. They eliminate the hassle of nails and screws. However, not all adhesives are created equal. Different projects may require different types, making your choice vital. Understanding the specifics of your project can aid in selecting the perfect adhesive.
A common mistake is assuming one type suits all needs. For example, some adhesives may work well for wood but fail on plastic. Testing a few options on scrap materials is a wise approach. Always consider the environment in which the adhesive will be used. Humidity and temperature can affect performance. Making an informed choice ensures strong, reliable results in your projects.

Understanding Nail Free Adhesives: Types and Applications
Nail free adhesives are gaining popularity in various projects, from woodworking to home repairs. These adhesives offer strong bonding without the mess of traditional nails. Understanding the different types helps in making an informed choice.
There are several types of nail free adhesives, each designed for specific applications. For instance, polyurethane adhesives are known for their robust waterproof capabilities. They are often used in outdoor projects. A study from the Adhesive and Sealant Council indicates that 34% of consumers prefer polyurethane for its durability. On the other hand, cyanoacrylate adhesives work well for quick fixes and are commonly used in household items. They bond rapidly but may not withstand high moisture levels.
It’s essential to consider the weight and type of materials being bonded. Some adhesives perform better with heavier materials like wood. Others excel with lightweight options. Research indicates that over 50% of users face challenges with compatibility. Experimenting with different types allows for better results. Users often report that trial and error is part of the process. Understanding your specific needs aids in selecting the best adhesive for your project. This careful selection can make or break the success of your work.
How to Choose the Best Nail Free Adhesive for Your Projects?
| Adhesive Type |
Best Applications |
Drying Time |
Strength |
Material Compatibility |
| PVA Adhesive |
Woodworking, Paper Crafts |
30 minutes |
Medium |
Wood, Paper, Cardboard |
| Cyanoacrylate (Super Glue) |
Plastic, Metal, Ceramics |
Seconds |
High |
Plastic, Metal, Glass |
| Epoxy |
Heavy Duty Repairs |
1-2 hours |
Very High |
Wood, Metal, Glass, Concrete |
| Hot Glue |
Crafts, Fabric |
Set in Minutes |
Medium |
Paper, Fabric, Plastic |
| Silicone Adhesive |
Sealing, Waterproofing |
24 hours |
Medium |
Glass, Plastic, Metal |
Factors to Consider When Choosing Nail Free Adhesives
When selecting nail-free adhesives, several factors come into play. Adhesive types vary based on composition and strength. For example, polyurethane adhesives offer robust bonding, while silicone adhesives are flexible. Understanding your project's specific needs is essential. A recent industry report noted that polyurethane adhesives can withstand extreme weather conditions, making them suitable for outdoor projects.
Surface preparation influences adhesive performance. Clean and dry surfaces enhance bonding strength. Rough surfaces can also improve adhesion due to increased contact area. A study indicated that poorly prepared surfaces lead to a 30% reduction in bonding effectiveness. Therefore, always prepare the surfaces adequately before application.
Tip: Test the adhesive on a small area first. This allows you to gauge performance before scaling up. Often, it's wise to consult product specifications for temperature and moisture tolerances. Remember that some adhesives may require activation methods. Evaluate your project's conditions carefully. Quality assurance is vital; poor choices can lead to costly mistakes or project delays.
Evaluating Strength and Durability of Adhesive Options
When evaluating strength and durability in adhesive options, it’s essential to consider your specific project needs. Different materials require different bonding strengths. A wooden project might not need the same adhesion strength as metal. Testing is crucial. Apply a small amount first to see how well it holds. This trial can save time and resources later.
Durability is another key factor. Some adhesives may hold well initially but fail over time. Consider factors like temperature changes and moisture exposure. High humidity can weaken some adhesives, making them less reliable. Remember that some products may provide a strong bond initially but could degrade under stress or over time.
Think about the intended use of your project. If it’s something that faces daily wear, durability becomes critical. Researching user experiences can offer insights. Ask for feedback from those who have used similar products. This real-world information can guide your decision and help you avoid mistakes.
Assessing Compatibility with Various Materials
When selecting a nail-free adhesive, assessing compatibility with various materials is crucial. Different adhesives react uniquely with surfaces like wood, metal, or plastic. For instance, some adhesives bond well with porous materials like wood but may not adhere effectively to smooth surfaces like glass. Knowing how these materials interact can save time and frustration in project execution.
Consider testing a small area before fully committing to an adhesive. This initial check can unveil unexpected weaknesses. For example, an adhesive that works perfectly on paper might not hold up under heat or moisture. Create a reference guide to document results, ensuring future projects go smoothly.
Each material brings its own set of challenges. You might find that some adhesives offer a strong bond initially, but they could weaken over time. Adapting to these nuances ensures you choose the right product for each specific application. Patience and experimentation can lead to more reliable results.
Compatibility of Nail Free Adhesives with Various Materials
Best Practices for Application and Maintenance of Adhesives
Choosing the right nail-free adhesive can significantly impact the longevity and effectiveness of your projects.
Application techniques matter. Clean surfaces ensure better adhesion. Dust and grease can weaken the bond.
Use a mild cleanser to remove impurities. Dry thoroughly before applying the adhesive. This simple step can save you from future frustrations.
Maintenance is equally essential. Regularly check your projects for signs of wear. If something appears loose, apply more adhesive promptly.
Don’t let small issues escalate. Consider temperature and humidity, as they affect adhesive performance.
Excess moisture can weaken bonds. In humid areas, think about extra precautions.
Reflect on your technique after each project. What worked well? What didn't? Learning from experience enhances your skills.
Pay attention to the curing time mentioned on your adhesive. Rushing this process can lead to unsatisfactory results.
Every detail counts.